How to Spot Paint Defects That Require Correction Before Ceramic Coating in Fargo in Ceramic Coating Fargo, ND
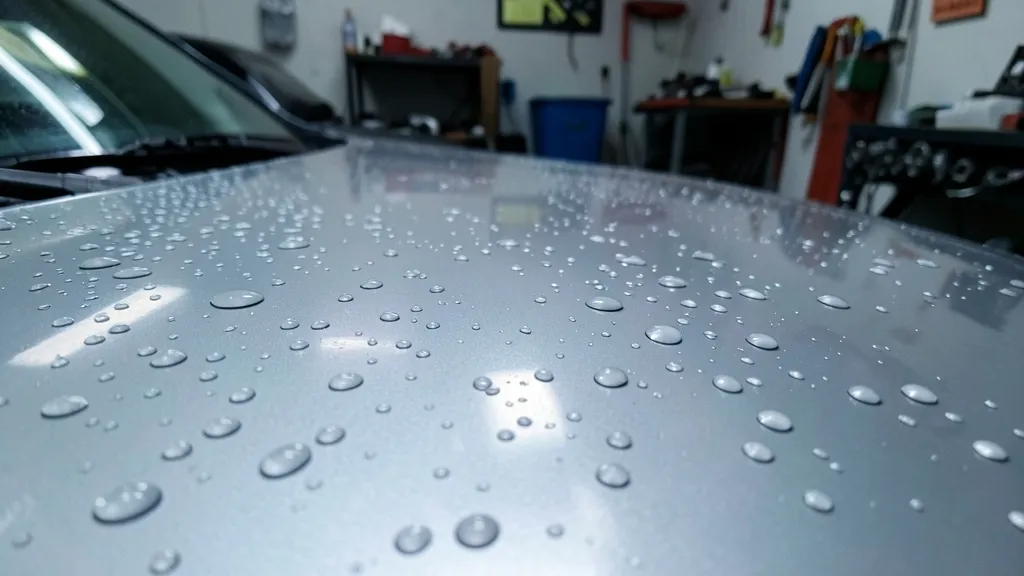
Ceramic coating locks in your vehicle’s finish—flaws and all. That’s why spotting and fixing paint defects before application is non-negotiable. Our team sees it often in Fargo: skipped correction leads to permanent imperfections under that glossy, hydrophobic layer.
Why Paint Correction Is Non-Negotiable Before Ceramic Coating
Ceramic coatings bond to the clear coat, amplifying every scratch, swirl, and etch. If defects remain, they’re sealed in for years. No coating can hide them—it only makes them more noticeable under direct light.
In our climate, winter road grime and summer UV exposure accelerate paint damage. Correction restores clarity, depth, and reflectivity so the coating adheres to a pristine surface.
Applying ceramic coating over uncorrected paint traps defects permanently. Removal requires wet-sanding the coating off—a costly, time-consuming process.
Common Paint Defects That Demand Correction
Swirl marks are fine, circular scratches from improper washing or drying. They scatter light, dulling the paint’s shine and becoming glaring under ceramic coating.
Oxidation appears as a chalky, faded layer on older or poorly maintained vehicles. It’s common in Fargo after harsh winters and requires compounding to remove.
Water spots and etching from hard water or acidic contaminants (like bird droppings) create permanent pits if left untreated. These need careful polishing or wet-sanding.
Holograms—those faint, wavy patterns—are caused by improper machine polishing. They’re subtle until a ceramic coating’s gloss highlights them under sunlight.
Orange peel texture is a factory finish issue where the paint looks dimpled. Heavy correction or even repainting may be needed for a mirror-like result.
How Fargo’s Climate Accelerates Paint Defects
Extreme temperature swings in North Dakota expand and contract paint, weakening the clear coat over time. This makes defects like cracks or peeling more likely.
Road salt and sand in winter abrade the surface, while summer pollen and tree sap etch into the clear coat if not removed promptly. These contaminants require thorough decontamination before correction.
Intense UV exposure fades and oxidizes paint faster here than in milder regions. A ceramic coating protects against future damage—but only if the existing defects are addressed first.
Paint Correction vs. Paint Protection Film: When to Choose Which
Paint correction is essential for restoring the surface before any protective layer. It’s a must for ceramic coatings, which require a flawless base to perform optimally.
Paint Protection Film (PPF) can hide minor defects because it’s a physical layer over the paint. However, severe swirls or oxidation should still be corrected first for the best results under the film.
| Defect Type | Paint Correction Required? | PPF Can Hide It? |
|---|---|---|
| Swirl Marks | Yes | Minor only |
| Oxidation | Yes | No |
| Water Spots/Etching | Yes | No |
| Holograms | Yes | No |
| Orange Peel | Often | Yes (if mild) |
| Deep Scratches | Yes (or repaint) | Yes |
Tools and Techniques We Use for Professional Paint Correction
A dual-action (DA) polisher with foam or microfiber pads is our go-to for most defects. It’s safer than rotary polishers for beginners but still delivers impressive results.
Compounds cut through heavy defects, while finer polishes refine the surface to a high gloss. We always follow with a finishing polish to eliminate haze.
Paint thickness gauges ensure we don’t over-polish, especially on edges or previously repainted panels. Thin paint risks burn-through, which is irreversible.
For severe defects, wet-sanding with ultra-fine grit paper (e.g., 2000-3000) may be necessary. This step requires precision to avoid creating new imperfections.
Essential Paint Correction Steps
- Wash and decontaminate the surface (clay bar, iron remover)
- Inspect under multiple light sources (halogen, LED, sunlight)
- Test polish on a small area to gauge effectiveness
- Measure paint thickness before and after correction
- Use progressively finer compounds/polishes
- Finish with a high-quality sealant or prep spray before coating
Signs Your Vehicle Needs Paint Correction Before Ceramic Coating
Run your fingers over the paint. If it feels rough or gritty, embedded contaminants or swirls are present. A smooth surface is non-negotiable for ceramic coating adhesion.
Look for dull or hazy areas, especially on horizontal surfaces like the hood or roof. These are classic signs of oxidation or water spot etching.
Check for visible scratches or swirls under direct light. Even if they’re not obvious in shade, they’ll stand out under a ceramic coating’s reflective finish.
Shine a bright LED flashlight across the paint at an angle. Defects cast shadows, making swirls, scratches, and holograms instantly visible. Do this in a shaded area for best results.
What to Expect During Professional Paint Correction in Fargo
A full correction typically takes 1-3 days, depending on the vehicle’s size and defect severity. We start with a thorough wash and decontamination to remove all surface contaminants.
Multi-stage polishing follows, with each step addressing finer imperfections. For severe cases, we may recommend a two-step or three-step correction process.
After correction, we inspect the paint under multiple light sources to ensure no defects remain. Only then do we proceed with ceramic coating application.
DIY vs. Professional Paint Correction: Know the Risks
DIY correction is possible for minor defects with the right tools and patience. However, inexperienced users often create holograms, burn-through, or uneven results.
Professionals have the training, tools, and experience to tackle severe defects safely. We stand by our work, so you’re protected if something goes wrong.
For vehicles in West Fargo, Moorhead, or Dilworth, where road conditions are tough, professional correction ensures your paint is truly ready for ceramic coating or PPF installation.
How to Inspect Your Paint for Defects Before Ceramic Coating
A thorough inspection ensures no defects are missed before coating application.
- 1Wash and Dry the Vehicle
Use a pH-neutral car shampoo and microfiber towels to remove surface dirt. Dry with a clean, plush towel to avoid introducing new swirls.
- 2Decontaminate the Paint
Apply a clay bar with lubricant to remove embedded contaminants like tar, iron particles, or industrial fallout. Follow with an iron remover spray if needed.
- 3Inspect Under Different Lighting
Check the paint in direct sunlight, shade, and under a bright LED or halogen light. Angle the light to reveal swirls, scratches, and holograms.
- 4Use the Baggie Test
Place a clear plastic baggie over your hand and run it over the paint. The friction makes defects more noticeable to the touch.
- 5Measure Paint Thickness
Use a paint thickness gauge to identify thin areas or previous repairs. Avoid aggressive correction in these spots to prevent burn-through.
- 6Document Defects
Take photos and notes of all defects. This helps track progress during correction and ensures nothing is overlooked.
Frequently Asked Questions
Can ceramic coating fix swirl marks in my paint?
No, ceramic coating cannot fix swirl marks—it will only make them more visible by adding gloss. Paint correction is required to remove swirls before applying the coating. In Fargo, where road debris is common, this step is critical for a flawless finish.
How do I know if my paint is too thin for correction?
A paint thickness gauge is the only sure way to know. Most vehicles have 4-6 mils of clear coat; anything below 2-3 mils risks burn-through. Our team checks this during every correction job to avoid damage.
Is paint correction necessary for new cars before ceramic coating?
Even new cars often have swirls from dealer prep or transport. A light correction (one-stage polish) is usually enough to perfect the finish. For vehicles in Horace or Mapleton, where dust and pollen are prevalent, this step ensures the coating bonds to a clean, defect-free surface.
What’s the difference between compounding and polishing?
Compounding uses abrasive compounds to remove a thin layer of clear coat, eliminating deeper defects. Polishing refines the surface with finer abrasives to restore clarity and shine. Both are often needed for a full correction before ceramic coating.
Can I apply ceramic coating over paint protection film?
Yes, but it’s rarely recommended. PPF already provides protection, and ceramic coating won’t bond as well to the film’s surface. If you want both, apply the coating to the paint first, then install PPF over it for areas like the hood or bumper.
How long does paint correction last before needing a ceramic coating?
Paint correction itself doesn’t wear out, but the corrected surface is vulnerable to new defects without protection. Ceramic coating locks in the correction, preserving the finish for years. Without it, swirls and oxidation can return within months, especially in Fargo’s harsh climate.